
Observability Overview
LLM applications are more than a single API call. A typical agent involves retrieval steps, tool calls, prompt assembly, multiple LLM invocations, and post-processing — all wired together in ways that are invisible at runtime. When something goes wrong, you need to see exactly what happened at every step.
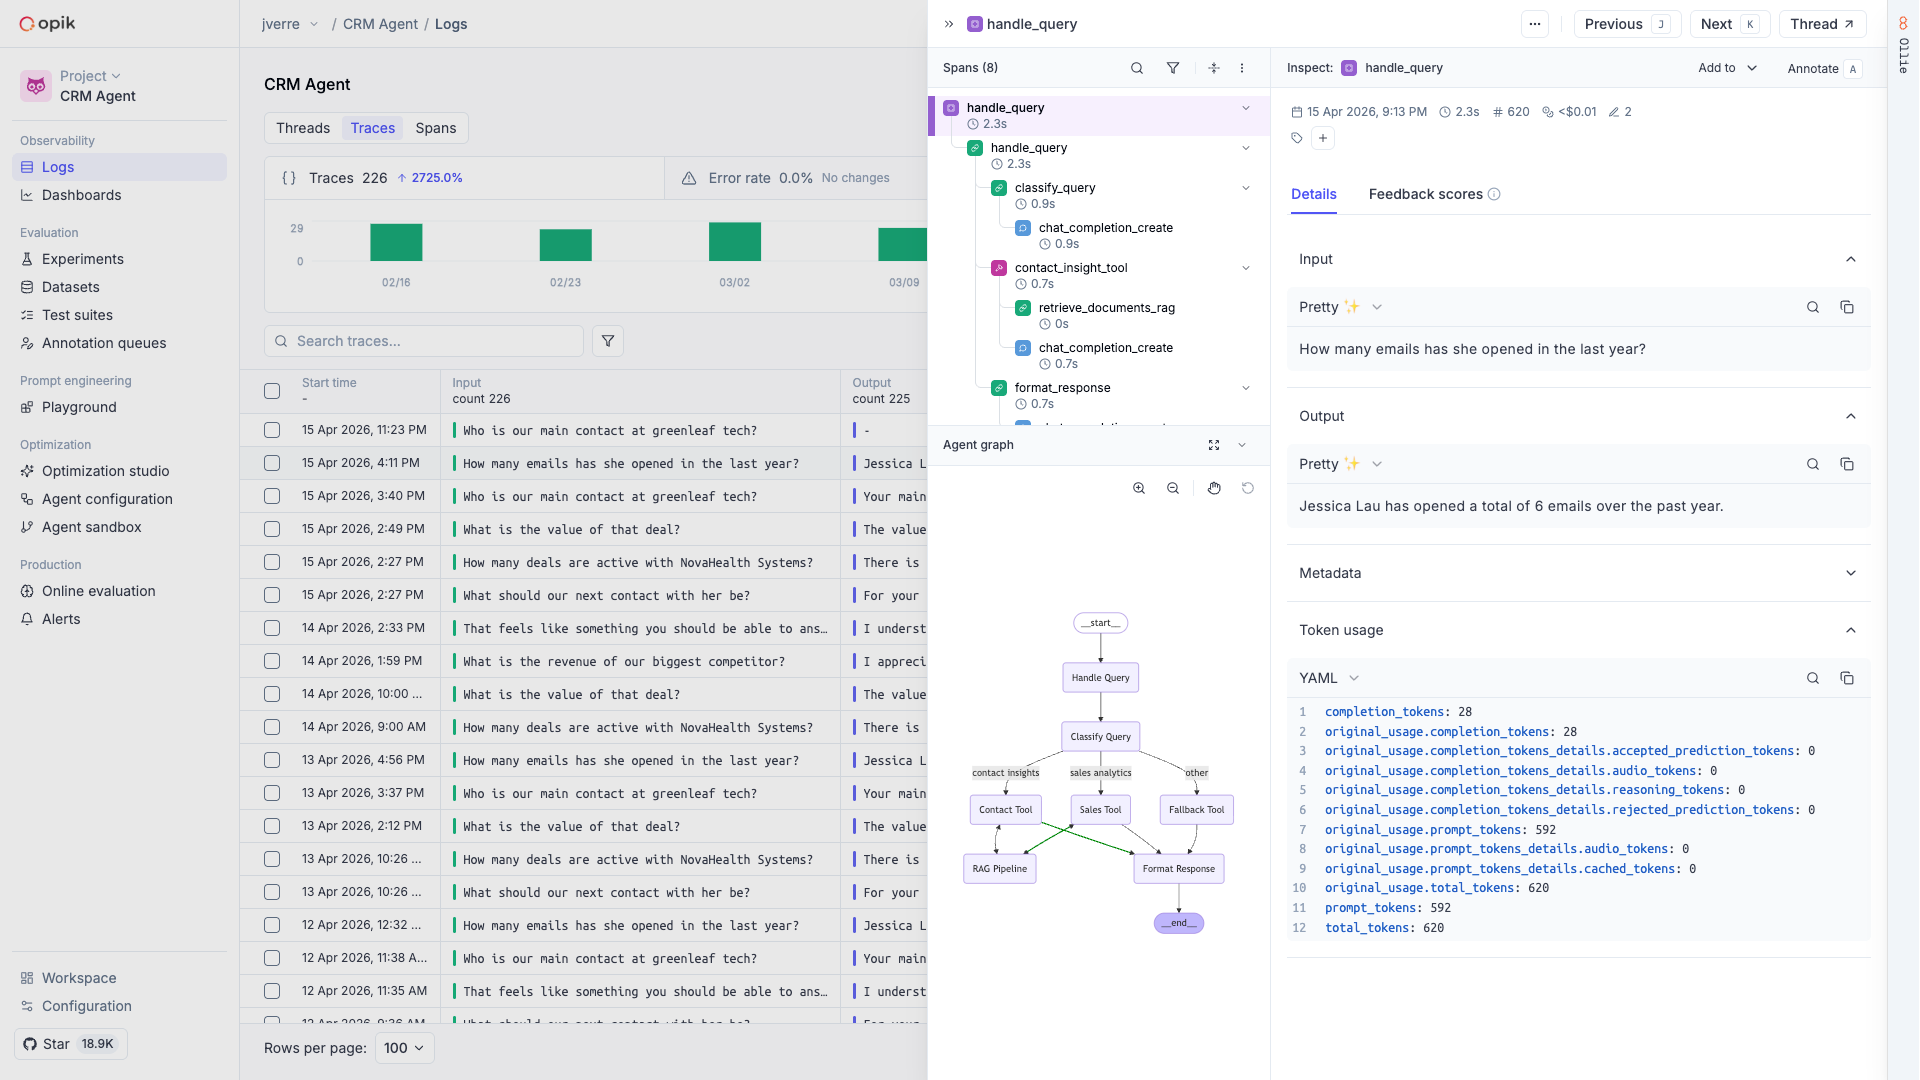
Opik gives you full visibility into every request your agent handles. Every LLM call, every tool invocation, every retrieval step is captured as a trace you can inspect, search, and analyze.
Why use Opik for observability
Section titled “Why use Opik for observability”Debugging LLM applications without observability means guessing. You see the final output but not why the model hallucinated, which retrieval step returned irrelevant context, or where latency spiked.
With Opik, you can:
- See the full execution path of every request — from user input through tool calls and LLM completions to the final response
- Root-cause production issues fast — filter and search traces by status, latency, cost, or custom tags to find the problem in seconds
- Track costs and latency over time — monitor token usage and spending across models and providers
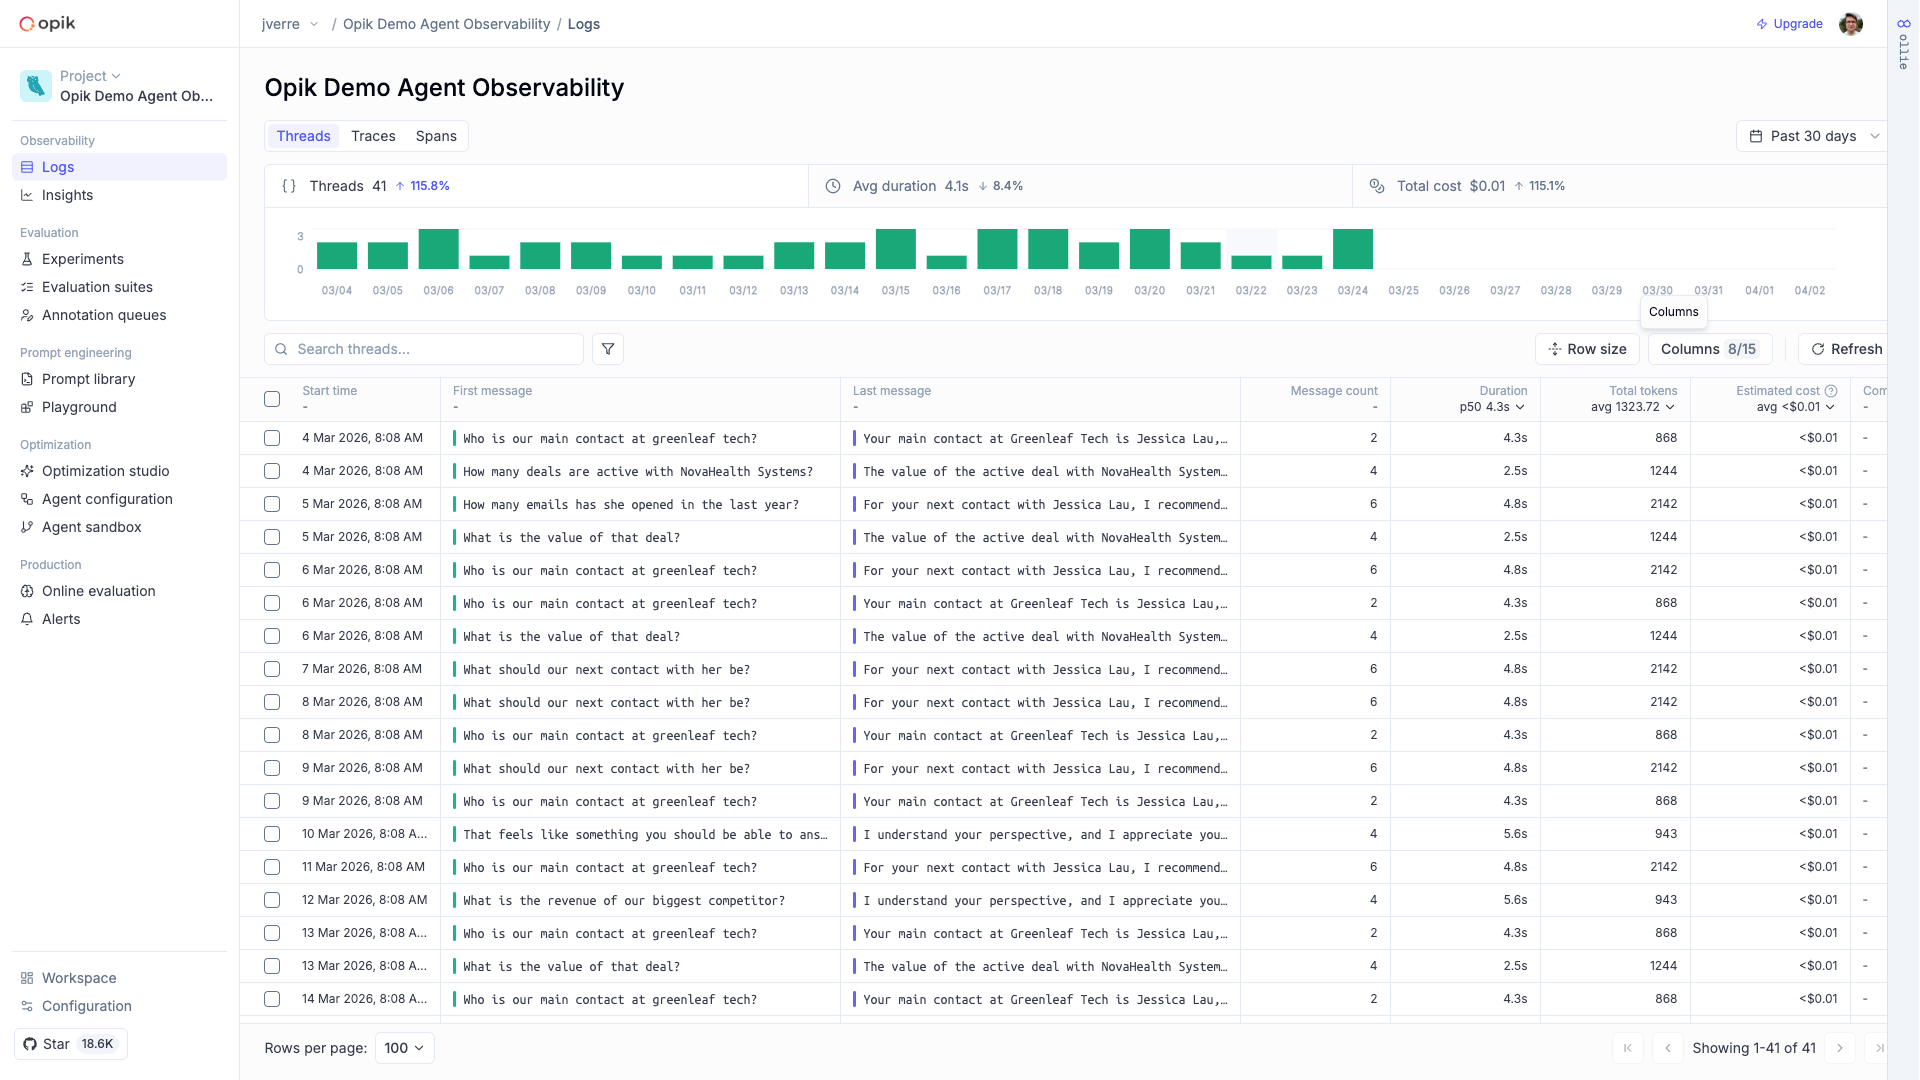
- Capture multi-turn conversations — group related traces into threads to understand how interactions evolve across turns
- Close the feedback loop — attach human or automated scores to traces and use them to drive evaluations
What you can capture
Section titled “What you can capture”Traces & spans
Full execution trees with inputs, outputs, timing, and metadata for every step
Conversations
Multi-turn threads that group related traces into coherent sessions
Cost tracking
Token usage and spending broken down by model, provider, and trace
Media & attachments
Images, audio, video, and files logged alongside your traces
User feedback
Qualitative and quantitative scores attached to individual traces
Agent graphs
Visual execution graphs showing how your agent's steps connect
How it works
Section titled “How it works”Connect your project
Run
opik connectfrom your agent's directory to pair it with Opik:Bash opik connect --project <YOUR_PROJECT_NAME>Instrument your code
The fastest way to add tracing is with opik-skills — install the skill and let your coding agent handle the rest:
Bash npx skills add comet-ml/opik-skillsThen ask your coding agent:
Instrument my agent with Opik using the /opik-instrument command.This works with Claude Code, Cursor, Codex, OpenCode, and other coding agents. You can also instrument manually with the SDK:
Python import opik @opik.track def my_agent(user_message): context = retrieve_context(user_message) response = call_llm(user_message, context) return responseTypeScript import { Opik } from "opik"; const client = new Opik(); const myAgent = client.track({ name: "my-agent", fn: async (userMessage: string) => { const context = await retrieveContext(userMessage); return await callLlm(userMessage, context); }, });View traces in the dashboard
Every request creates a trace with detailed span-level information. You can inspect the full execution tree, see inputs and outputs at each step, and filter by duration, cost, status, or tags.
Analyze and improve
Use traces to debug failures, identify slow steps, and track quality over time. Attach feedback scores, run evaluations against datasets, and use Ollie — Opik's AI assistant — to help root-cause issues automatically.
Integrations
Section titled “Integrations”Opik has first-class support for 30+ frameworks in Python, TypeScript, and OpenTelemetry — so you can start capturing traces without changing how your application is built.
Next steps
Section titled “Next steps”- Getting started — Add observability to your agent in minutes
- Concepts — Understand traces, spans, threads, and feedback scores
- Debugging agents with Ollie — Use AI-assisted root-cause analysis
- Cost tracking — Monitor token usage and spending
- MCP server — Read these traces from your AI coding assistant, without leaving your editor